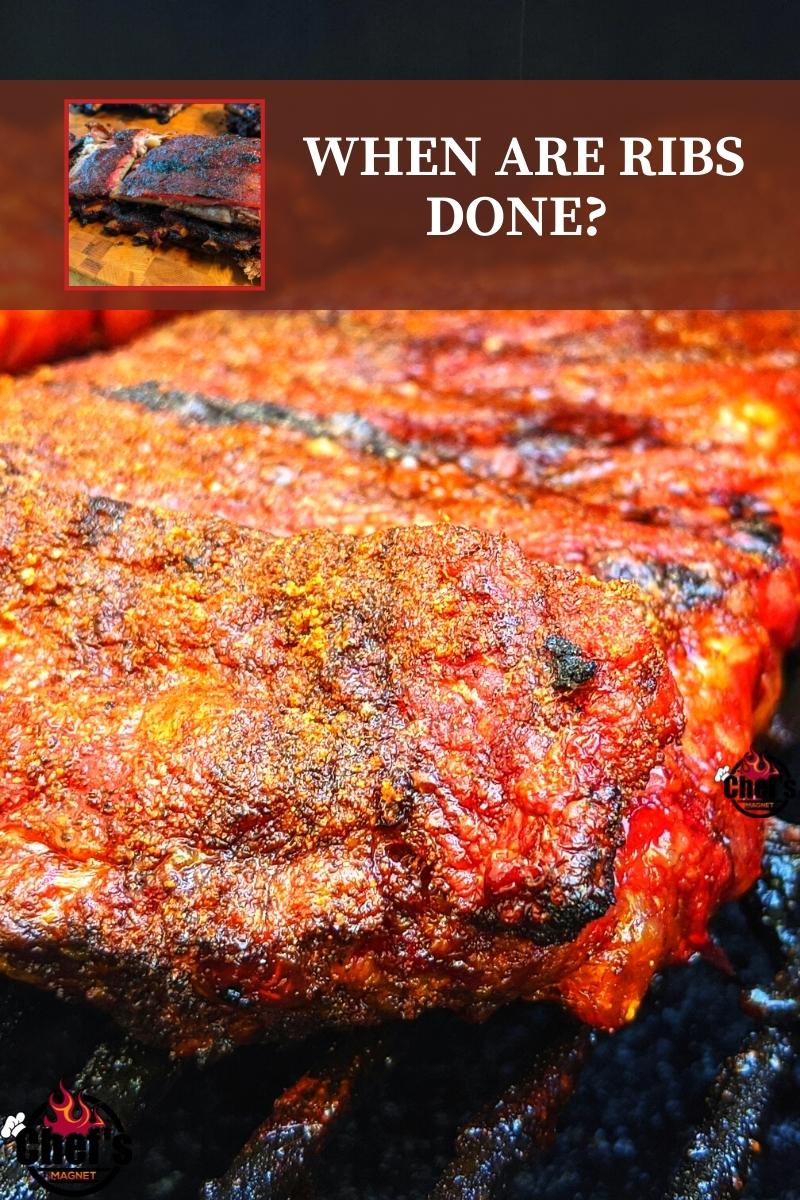
Many ask, how do you know when your ribs are done or ready? There isn’t an exact temperature or time determining when ribs are done. Many factors go into how long it will take to smoke your ribs, including the rib’s weight and thickness. Not to mention it’s more difficult keeping an outdoor oven at a precise temperature.
Is There A Difference Between If Your Ribs Are Done or Ready?

Just because the ribs are done doesn’t mean they are ready. According to USDA, ribs are “done” when they have reached an internal temperature of 145°F; however, they will still be tough and chewy at this temperature. Not at all delicious. You need to take them up to 190 to 203°F for them to be ready. This is when the collagens and fats have melted, making the meat more tender and juicy.
Should Ribs Fall off the Bone When Done?
They shouldn’t fall off the bone. Cooking your ribs properly will cause the meat to pull cleanly off the bone with your teeth while keeping some resilience and chew. Similar to a properly cooked steak. It should be tender and not tough. Ribs that fall off the bone have been either boiled or steamed. A process that usually robs them of great flavor.

How To Tell When Your Ribs Are Ready?
You can choose from several methods when testing if your ribs are done and ready. From spot-checking, the temperature with a thermometer to bending the rack and looking for cracks, choose two or more of the eight options below every time you cook some ribs.
Use a Thermometer
The first thing you do is have a high-quality instant-read thermometer. Ribs are a challenge to spot-check temps since the meat varies in size from end to end, and the closer the meat is to the bone, the more likely the internal temperature will get wrongly measured. Due to this challenge, there are several tests you can perform on your meat to determine if they are indeed ready.
In this first step, even though it isn’t perfect, you’ll use an instant-read thermometer tospot-checkk areas when you feel you are nearing completion. You are shooting for a minimum of 190°F to a maximum of 203°F. I prefer to aim for the latter.
Since ribs and smokers vary, begin with a thermometer, but incorporate some of these other tests as well.
The Time Test
First, if you’re smoking them at the recommended 225°F, at sea level, a slab of baby back ribs will take approx. 4-5 hours or St. Louis cut ribs or spares will take approx. 6-7 hours. If you live at a higher altitude like me, you should add 20% or more to the smoking time.
At this stage of smoking, the ribs are a little underdone. Now is the time to mob on some sauce and continue to cook for 5 minutes on each side at a higher temperature. Keep a close eye on them so they won’t burn. If you skip the sauce step, add about 30 minutes to your smoking time.
I should reiterate that the smoking times will vary since each slab is different.
The Bend Test

Also known as the “Bounce Test.” This is my go-to test. Using a sturdy pair of grilling tongs, lift the rack near the center. Ideally, as soon as you lift the ribs, you should feel that they are close to breaking, and you may need to give it a little bounce. When the ribs are ready, they will bow and crack on the surface. A small crack means you’ll need more time.

It can take a bit of practice to get this method down. The reasoning behind this method is that when the meat has cooked enough, the connective tissues will have broken down, and the skin is left holding the slab tightly together.
The Twist Test
Another test to determine if the connective tissue has broken down. To perform this test, remove the rack from the smoker and select a rib from the middle of the rack. Without burning your fingers, grab onto the exposed bone and gently twist it. Don’t do this too forcefully, or you won’t get an accurate feel. While doing this, check to see if the bone breaks free of the meat. If it does, then the ribs are ready. By breaking free, you know that the collagens connecting the tissues have turned to gelatin.
The Popup Test
Many websites and books will suggest watching for the meat to shrink and expose the end of the rib bones. This isn’t a good test and is not always a sign that the ribs are done. Heat can cause shrinkage; therefore, by putting them in a hot smoker, they may shrink within an hour and be far from ready. If you smoke at a temperature under 250°F, which I recommend, by the time the meat shrinks back enough, the meat will be overcooked.
The Peek-A-Boo Test
This involves cutting into the center of the meat to check the colors. If the center of the meat is white and there are no pink juices, your ribs are done. Keep in mind that the meat near the surface will be pink by smoking your ribs.
The Taste Test
You can remove one of the bones on the end of the rack, take a look at it, and then taste. This not only gives you a good idea of how the ribs are tasting, but you get to eat some! The downside comes when they aren’t ready, and you keep taking more bones off the rack as you keep taste testing.
The Toothpick Test
To do this, poke a toothpick into the meatiest parts of the ribs. If it glides in with no resistance, the ribs are ready. Make sure to check a few spots along your rack of ribs. This can be tough to judge, and you’ll get better over time, so combine this method with at least one other in this list.
How Long Will It Take to Smoke Ribs?
It Depends.
Read How Long Does It Take To Smoke Ribs?
Below is a Pinterest friendly photo…. so you can pin it to your Smoking Food Board!!


![Personalized Science T-Shirt, [NAME] Eats Bacon Periodically, Science Gift For Teachers, Gift For Dad](https://i.etsystatic.com/39088648/c/677/537/250/479/il/81da41/5524136388/il_170x135.5524136388_ejht.jpg)
![Personalized Funny BBQ Gift T-Shirt, [NAME] Likes To Smoke Food It Gives Him A Reason To Play With Fire, Gift For Men, Gift For Dad](https://i.etsystatic.com/39088648/c/715/567/310/398/il/df3b57/5524134348/il_170x135.5524134348_l4vh.jpg)
![Personalized Funny BBQ Gift T-Shirt, [NAME]'s Addicted To Smoking, Gift For Men, Gift For Dad](https://i.etsystatic.com/39088648/c/688/546/321/419/il/04f17e/5572258249/il_170x135.5572258249_loz4.jpg)
![Personalized Option Funny BBQ Gift T-Shirt, Don't Worry I Got This I Watched A YouTube Video, Quite by [NAME] Gift For Men, Gift For Dad](https://i.etsystatic.com/39088648/c/1451/1152/714/207/il/eecec9/5524515802/il_170x135.5524515802_qbvj.jpg)


![Personalized Funny BBQ Gift Mug, Don't Worry I Got This I Watched A YouTube Video, By [NAME], Gift For Men, Gift For Dad](https://i.etsystatic.com/39088648/c/2982/2368/0/27/il/cf62b0/5272771721/il_170x135.5272771721_pz0h.jpg)

![Personalized Science Apron, [NAME] Uses [Pronoun] Smoker Periodically, Science Gift For Teachers, Gift For Dad](https://i.etsystatic.com/39088648/c/2982/2368/0/9/il/6bf723/5272542103/il_170x135.5272542103_18nf.jpg)

